Saturday, August 22, 2020
Thursday, December 5, 2019
Wednesday, November 13, 2019
Tuesday, June 11, 2019
Friday, April 26, 2019
Tamron 18-270mm f/3.5-6.3 Di II VC PZD AF

April 12, 2011
by Andrew Alexander
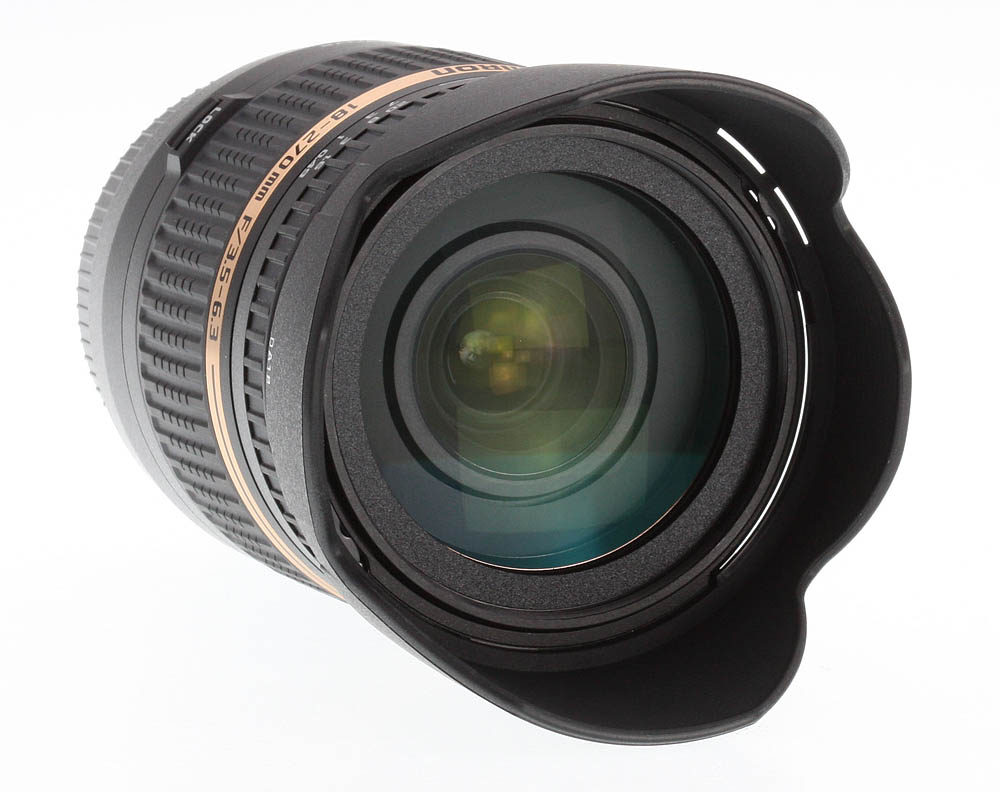
We tested the original Tamron superzoom in early 2009, citing its handiness and compact size as the main advantages. In the late-2010 refresh of the lens, Tamron has developed a new focusing technology using Piezoelectric drive, instead of an ultrasonic ring motor or conventional DC motor to drive the focusing elements. Additional changes include the use of rounded diaphragm blades, the use of 62mm instead of 72mm filters, and an overall reduction in size and weight. The 18-270mm is a Di-II lens, meaning it was designed for the reduced size of a subframe (APS-C) digital sensor.
On a Canon digital body this will equate to an equivalent 35mm field of view of 29-432mm, and on a Nikon digital body this equates to 27-405mm. This lens isn't a "constant" lens, in that as you increase the focal length, both the maximum and minimum aperture sizes decrease. The following table reflects the changes as you zoom:
The lens ships with a petal-shaped lens hood, and is available now
for around US$650. The lens is available in Nikon and Canon mounts
currently, and will be available in a non-VC Sony mount in April 2011.
Note: On September 6 2016, a slightly revised model (B008TS) was announced for the Japanese market which features a fluorine coating on the front element as well as updated styling. Click here for more info.
Sharpness
The Tamron 18-270mm PZD (B008) plays a difficult game of design compromise, becoming a jack-of-all-trades, but master of none. Its performance can be segregated into two categories: wide-angle performance (18-70mm) and telephoto (100-270mm).
The lens performs best in its wide-angle setting, with the optimum setting for sharpness being a toss-up between 35mm or 70mm at ƒ/8. When used wide-open at the wider angles (and yes, I recognize that technically, 70mm is certainly not a ''wide'' angle) there is some light corner shading, more noticeable in this sample in the bottom left and right corners. The center performs quite well at 18mm, offering its best performance at ƒ/5.6 - not tack-sharp, but close to it.
In this wider-angle category, stopping down further than ƒ/8 doesn't produce significantly sharper results, and diffraction limiting starts degrading results by ƒ/11. Curiously, 50mm stands out slightly with a slight degradation in performance, between the 35mm and 70mm marks.
In the telephoto category (100mm-270mm) sharpness performance isn't quite as good. Wide open at 100mm, we note quite soft performance in the bottom left and right corners (suggesting at least some de-centering in this sample) mixed with fairly good center performance. Stopping down to ƒ/8 or ƒ/11 clears up the corner softness quite well, but doesn't really improve central sharpness.
The situation at 200-270mm is interesting; set to 200mm at ƒ/8, we note significant corner softness, again at the bottom left and right corners. Even at ƒ/11 and ƒ/16 it's still there. However, at 270mm performance is slightly better at ƒ/8 and ƒ/11 (while somewhat ugly at ƒ/6.3), suggesting to us that the lens has been specifically optimized to work best at specific settings within the focal range.
Fully stopped-down performance is acceptable at 18mm and 35mm - just slightly soft, across the frame - but at 50mm and longer, it becomes quite blurred indeed, while providing very small apertures of ƒ/32-ƒ/40.
Chromatic Aberration
Tamron handles chromatic aberration fairly well with this lens, especially in the mid-range. It's only at 18mm and at 200mm and above that significant CA can be found in the corners. Readers may wish to consult our sample photos for a more visual explanation.
Shading (''Vignetting'')
Between 35-70mm, corner shading isn't a factor with this lens. It's only in the wide angle (18mm) and at 100mm and above that light falloff presents a slight issue. At 18mm, there's always at least 1/4EV of corner shading, and if you use it wide open at ƒ/3.5, that increases to 1/2EV. At 100mm, 200mm and 270mm, you get 1/3EV if you use the lens wide open.
Distortion
Predictably, the complex array of lens elements that allows such a vast range of focal lengths in one lens leads to some dramatic results for distortion. When used in the wide angle configuration, the lens provides uniform barrel (''bloat'') distortion up to around 24mm, with dramatic distortion in the corners (1.25%, quite significant). After 24mm, distortion across the frame remains consistently barrel-distorted, but at a moderately low level (around 0.25%, on average) and the extreme corner distortion turns into the pincushion (''squeeze'') style. The worst pincushion distortion is noted between 35-70mm, where the corners show -0.8% pincushion distortion. Post-processing would be required to correct for these effects.
Autofocus Operation
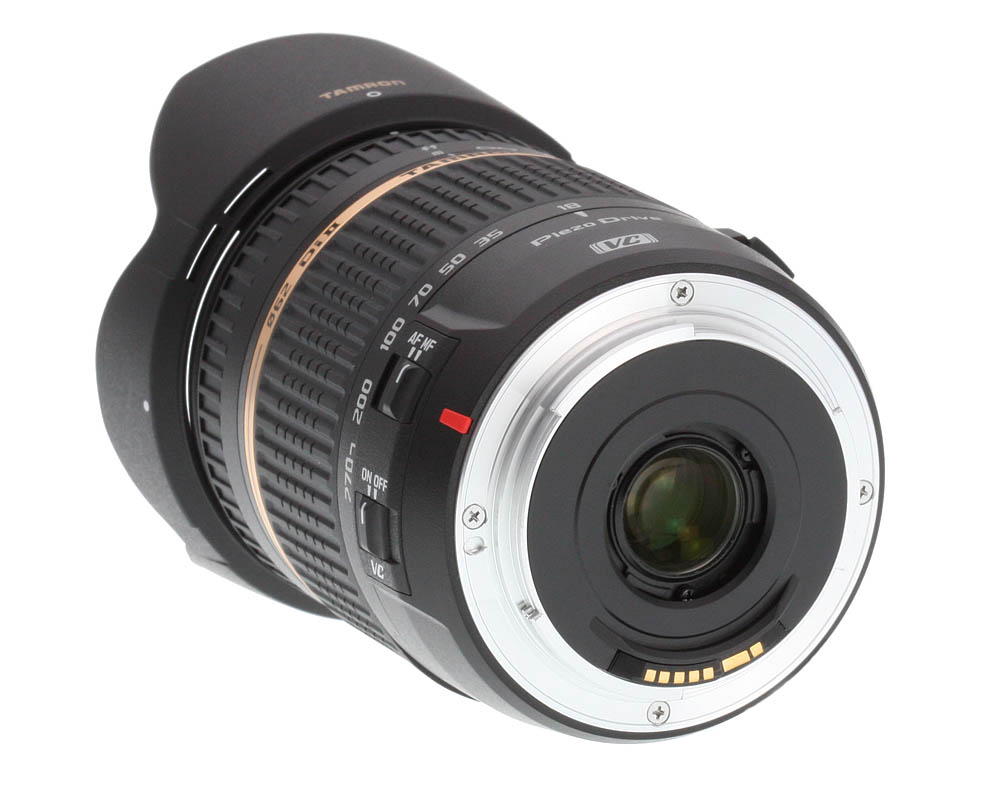
The Tamron 18-270mm uses a new autofocus motor, the PZD (Piezo Drive). The new motor is substantially less noisy compared to the older drive, and it's substantially faster - but it won't be setting any records in the speed department. It takes about a second to go through the focusing range. It may be that the increased throw range of the focusing ring (45 degrees instead of a slim 30) offsets an increase in speed. Also, you can't just override autofocus results by turning the focusing ring; you must select manual focus to do this.
Macro
The original 18-270mm included a macro designation, and had a 0.29x magnification; the new lens only provides 0.26x magnification. The minimum close-focusing distance is still 49cm (just over 19 inches).
Build Quality and Handling
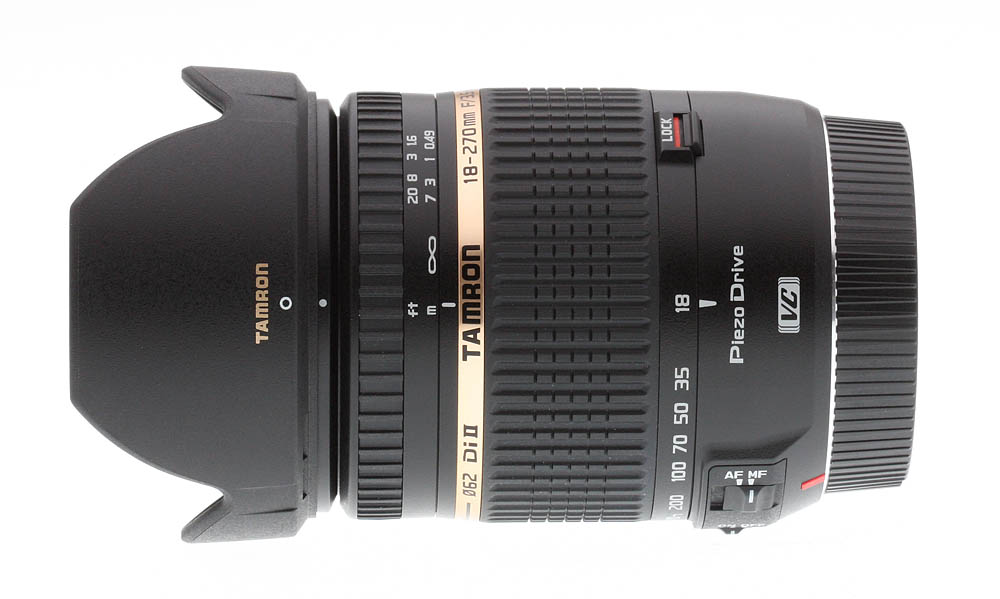
The original Tamron 18-270mm was already designed to be relatively light by using a plastic chassis, but Tamron has managed to shave a further 110 grams (3 ounces) off the weight in this newer version. The lens mount is still metal and despite the plastic construction there is no noticeable rattling or flexing. The focus ring is mounted near the front of the lens, and the large zoom ring is found closer to the lens mount. Both rings use a nice rubber ridged pattern that is well dampened and easy to grip.
The reduction in weight is likely accomplished at least in part by a small design concession; the maximum aperture size is slightly diminished when compared to the previous version of the lens. For example, on the new lens at 35mm, the maximum aperture setting is ƒ/4.5, whereas on the old lens it was ƒ/4. It's probably not much that'll require getting adjusted to (it's only a third-of-a-stop change) but it's worth noting.
The lens is fairly uncomplicated to use; if you've used the original 18-270mm, the new lens presents no surprises. There are only two controls to speak of: one switch to enable or disable the lens' autofocus operation, and another switch to activate or deactivate the vibration control feature. A distance scale is indicated on the lens, in feet and meters; no depth-of-field scale is present, and nor is there an infrared index.
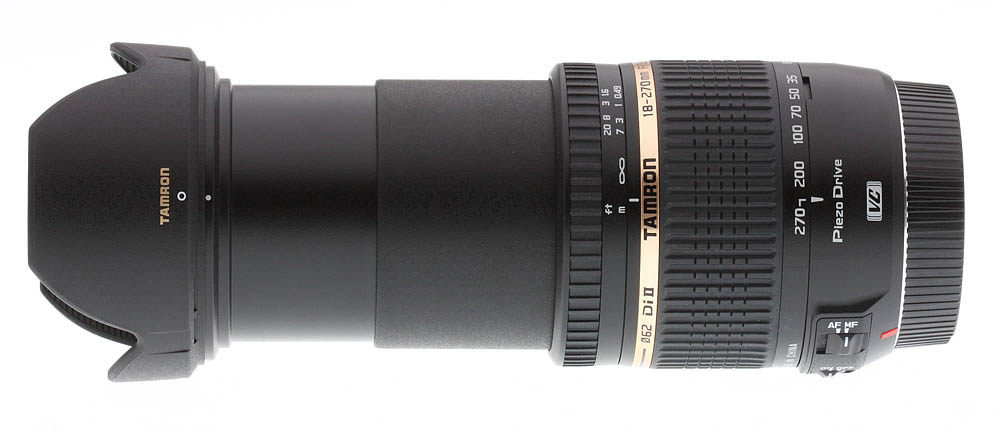
The zoom function of the lens is controlled by the larger of the two rings on the lens, rotating approximately 90 degrees to extend the lens through its entire range of focal lengths. The ring is made of a tough rubber, with recessed ridges, and is a comfortable 1 1/8 inches wide. The zoom ring is nicely cammed and easy to turn - easier than the original version, it's also worthy to note. Zooming out to 270mm adds 3 inches to the lens' total length, going from a compacted length of 3 1/2 inches to almost double that, or 6 1/2 inches. Zoom creep is not a factor with this lens, however, it could become so over time, so Tamron has included a zoom lock switch to lock the lens at 18mm.
The focus ring of the lens, located near the front of the lens, is a quarter-inch wide, composed of a deeply ridged rubber. There isn't a lot of travel for the purposes of manual focusing - approximately 45 degrees. Not great, but better than the original lens which had just 30 degrees of travel. The ring offers very little resistance though, so you may find getting the exact point of manual focus a bit tricky. There are hard stops at either end of the focusing spectrum, and the lens will focus past infinity. The front element does not rotate during focus operations, making life a little easier for filter users. The lens uses 62mm filters.
Tamron employs its Vibration Compensation (VC) technology in this lens, claiming an improvement of four stops in hand-holding stabilization. Tamron suggests disabling VC when taking long exposures. We'll have our own IS test available for this lens shortly.
The included DA18 petal-shaped lens hood reverses onto the lens for storage. The hood is ribbed on the interior, and when mounted, adds almost 1.5 inches to the overall length of the lens.
Alternatives
Tamron 18-270mm ƒ/3.5-6.3 Di II VC LD Aspherical IF Macro AF ~$620
Compared to the original 18-270mm, the new 18-270 PZD offers faster and quieter autofocus. Sharpness is better in some cases, worse in others; distortion and corner shading results are about the same, chromatic aberration resistance is slightly improved. The lens isn't as ''fast'' optically as the previous version; its maximum aperture decreases more rapidly, but this has allowed the lens to be smaller and lighter. About the same price.
Canon EF-S 18-200mm ƒ/3.5-5.6 IS ~$700
The Canon 18-200mm doesn't offer the same zoom reach, but the difference between 200mm and 270mm isn't huge. The Canon is sharper than the Tamron, though offering the same or slightly poorer performance relating to chromatic aberration, corner shading and distortion.
Nikon 18-200mm ƒ/3.5-5.6G IF-ED AF-S DX VR II ~$800
Perhaps the best of the superzooms, the Nikon doesn't offer the same reach, but if one were to pick the nits strongly enough we might say it's got the best sharpness performance of the lot. Great resistance to chromatic aberration, except for the extreme corners - though the Tamron handles distortion and corner shading a bit more gracefully. However, the most expensive in this lot, too.
Sony 18-250mm ƒ/3.5-6.3 DT ~$580
The Sony is surprisingly inexpensive, less costly than the Tamron, and almost matches the Tamron in its reach. The Sony is on par with the Tamron for sharpness (each has their own foibles) and offers slightly better tolerance to CA; however, the Tamron distorts slightly less and has less corner shading.
Sigma 18-250mm ƒ/3.5-6.3 DC OS HSM ~$480
The Sigma 18-250mm offers almost the same reach as the Tamron, and is the most economical of the bunch. However it has some deficiencies relating to sharpness, especially when used wide open. Chromatic aberration is also fairly evident when using this lens. On the flip side, it's probably the best performer when it comes to distortion and corner shading, with the lowest test results.
Conclusion
As you can see in the alternatives section, the manufacturers have realized that they can't afford to ignore the travel zoom market, and there is plenty of choice for all camera brands. Tamron leads the pack with reach, though not by much; the actual difference between 200mm, 250mm and 270mm is not a whole lot to write home about. The 18-270mm ƒ/3.5-6.3 PZD is, for the most part, an improvement on the original lens, especially concerning autofocus performance. It's now significantly faster and much quieter. However, there's not much relating to improved lens performance, so it is probably a design story about maintaining an existing level of quality.
If you were bothered by the autofocus performance of the old 18-270mm, it's worth the upgrade; if you're looking for the absolute most telephoto reach in the smallest conventional package, it's worth the sale. But I wouldn't rule out other alternatives, especially if you want the best performance for sharpness or other quality indicators.
Product Photos
Sample Photos
The VFA target should give you a good idea of sharpness in the center and corners, as well as some idea of the extent of barrel or pincushion distortion and chromatic aberration, while the Still Life subject may help in judging contrast and color. We shoot both images using the default JPEG settings and manual white balance of our test bodies, so the images should be quite consistent from lens to lens.
As appropriate, we shoot these with both full-frame and sub-frame
bodies, at a range of focal lengths, and at both maximum aperture and
ƒ/8. For the ''VFA'' target (the viewfinder accuracy target from Imaging
Resource), we also provide sample crops from the center and upper-left
corner of each shot, so you can quickly get a sense of relative
sharpness, without having to download and inspect the full-res images.
To avoid space limitations with the layout of our review pages, indexes
to the test shots launch in separate windows.
by Andrew Alexander
We tested the original Tamron superzoom in early 2009, citing its handiness and compact size as the main advantages. In the late-2010 refresh of the lens, Tamron has developed a new focusing technology using Piezoelectric drive, instead of an ultrasonic ring motor or conventional DC motor to drive the focusing elements. Additional changes include the use of rounded diaphragm blades, the use of 62mm instead of 72mm filters, and an overall reduction in size and weight. The 18-270mm is a Di-II lens, meaning it was designed for the reduced size of a subframe (APS-C) digital sensor.
On a Canon digital body this will equate to an equivalent 35mm field of view of 29-432mm, and on a Nikon digital body this equates to 27-405mm. This lens isn't a "constant" lens, in that as you increase the focal length, both the maximum and minimum aperture sizes decrease. The following table reflects the changes as you zoom:
| Focal length (mm) |
18 | 35 | 50 | 70 | 100 | 200 to 270 |
| Max. aperture |
ƒ/3.5 | ƒ/4.5 | ƒ/5 | ƒ/5.6 | ƒ/5.6 | ƒ/6.3 |
| Min. aperture |
ƒ/22 | ƒ/29 | ƒ/29 | ƒ/32 | ƒ/36 | ƒ/40 |
Note: On September 6 2016, a slightly revised model (B008TS) was announced for the Japanese market which features a fluorine coating on the front element as well as updated styling. Click here for more info.
Sharpness
The Tamron 18-270mm PZD (B008) plays a difficult game of design compromise, becoming a jack-of-all-trades, but master of none. Its performance can be segregated into two categories: wide-angle performance (18-70mm) and telephoto (100-270mm).
The lens performs best in its wide-angle setting, with the optimum setting for sharpness being a toss-up between 35mm or 70mm at ƒ/8. When used wide-open at the wider angles (and yes, I recognize that technically, 70mm is certainly not a ''wide'' angle) there is some light corner shading, more noticeable in this sample in the bottom left and right corners. The center performs quite well at 18mm, offering its best performance at ƒ/5.6 - not tack-sharp, but close to it.
In this wider-angle category, stopping down further than ƒ/8 doesn't produce significantly sharper results, and diffraction limiting starts degrading results by ƒ/11. Curiously, 50mm stands out slightly with a slight degradation in performance, between the 35mm and 70mm marks.
In the telephoto category (100mm-270mm) sharpness performance isn't quite as good. Wide open at 100mm, we note quite soft performance in the bottom left and right corners (suggesting at least some de-centering in this sample) mixed with fairly good center performance. Stopping down to ƒ/8 or ƒ/11 clears up the corner softness quite well, but doesn't really improve central sharpness.
The situation at 200-270mm is interesting; set to 200mm at ƒ/8, we note significant corner softness, again at the bottom left and right corners. Even at ƒ/11 and ƒ/16 it's still there. However, at 270mm performance is slightly better at ƒ/8 and ƒ/11 (while somewhat ugly at ƒ/6.3), suggesting to us that the lens has been specifically optimized to work best at specific settings within the focal range.
Fully stopped-down performance is acceptable at 18mm and 35mm - just slightly soft, across the frame - but at 50mm and longer, it becomes quite blurred indeed, while providing very small apertures of ƒ/32-ƒ/40.
Chromatic Aberration
Tamron handles chromatic aberration fairly well with this lens, especially in the mid-range. It's only at 18mm and at 200mm and above that significant CA can be found in the corners. Readers may wish to consult our sample photos for a more visual explanation.
Shading (''Vignetting'')
Between 35-70mm, corner shading isn't a factor with this lens. It's only in the wide angle (18mm) and at 100mm and above that light falloff presents a slight issue. At 18mm, there's always at least 1/4EV of corner shading, and if you use it wide open at ƒ/3.5, that increases to 1/2EV. At 100mm, 200mm and 270mm, you get 1/3EV if you use the lens wide open.
Distortion
Predictably, the complex array of lens elements that allows such a vast range of focal lengths in one lens leads to some dramatic results for distortion. When used in the wide angle configuration, the lens provides uniform barrel (''bloat'') distortion up to around 24mm, with dramatic distortion in the corners (1.25%, quite significant). After 24mm, distortion across the frame remains consistently barrel-distorted, but at a moderately low level (around 0.25%, on average) and the extreme corner distortion turns into the pincushion (''squeeze'') style. The worst pincushion distortion is noted between 35-70mm, where the corners show -0.8% pincushion distortion. Post-processing would be required to correct for these effects.
Autofocus Operation
The Tamron 18-270mm uses a new autofocus motor, the PZD (Piezo Drive). The new motor is substantially less noisy compared to the older drive, and it's substantially faster - but it won't be setting any records in the speed department. It takes about a second to go through the focusing range. It may be that the increased throw range of the focusing ring (45 degrees instead of a slim 30) offsets an increase in speed. Also, you can't just override autofocus results by turning the focusing ring; you must select manual focus to do this.
Macro
The original 18-270mm included a macro designation, and had a 0.29x magnification; the new lens only provides 0.26x magnification. The minimum close-focusing distance is still 49cm (just over 19 inches).
Build Quality and Handling
The original Tamron 18-270mm was already designed to be relatively light by using a plastic chassis, but Tamron has managed to shave a further 110 grams (3 ounces) off the weight in this newer version. The lens mount is still metal and despite the plastic construction there is no noticeable rattling or flexing. The focus ring is mounted near the front of the lens, and the large zoom ring is found closer to the lens mount. Both rings use a nice rubber ridged pattern that is well dampened and easy to grip.
The reduction in weight is likely accomplished at least in part by a small design concession; the maximum aperture size is slightly diminished when compared to the previous version of the lens. For example, on the new lens at 35mm, the maximum aperture setting is ƒ/4.5, whereas on the old lens it was ƒ/4. It's probably not much that'll require getting adjusted to (it's only a third-of-a-stop change) but it's worth noting.
The lens is fairly uncomplicated to use; if you've used the original 18-270mm, the new lens presents no surprises. There are only two controls to speak of: one switch to enable or disable the lens' autofocus operation, and another switch to activate or deactivate the vibration control feature. A distance scale is indicated on the lens, in feet and meters; no depth-of-field scale is present, and nor is there an infrared index.
The zoom function of the lens is controlled by the larger of the two rings on the lens, rotating approximately 90 degrees to extend the lens through its entire range of focal lengths. The ring is made of a tough rubber, with recessed ridges, and is a comfortable 1 1/8 inches wide. The zoom ring is nicely cammed and easy to turn - easier than the original version, it's also worthy to note. Zooming out to 270mm adds 3 inches to the lens' total length, going from a compacted length of 3 1/2 inches to almost double that, or 6 1/2 inches. Zoom creep is not a factor with this lens, however, it could become so over time, so Tamron has included a zoom lock switch to lock the lens at 18mm.
The focus ring of the lens, located near the front of the lens, is a quarter-inch wide, composed of a deeply ridged rubber. There isn't a lot of travel for the purposes of manual focusing - approximately 45 degrees. Not great, but better than the original lens which had just 30 degrees of travel. The ring offers very little resistance though, so you may find getting the exact point of manual focus a bit tricky. There are hard stops at either end of the focusing spectrum, and the lens will focus past infinity. The front element does not rotate during focus operations, making life a little easier for filter users. The lens uses 62mm filters.
Tamron employs its Vibration Compensation (VC) technology in this lens, claiming an improvement of four stops in hand-holding stabilization. Tamron suggests disabling VC when taking long exposures. We'll have our own IS test available for this lens shortly.
The included DA18 petal-shaped lens hood reverses onto the lens for storage. The hood is ribbed on the interior, and when mounted, adds almost 1.5 inches to the overall length of the lens.
Alternatives
Tamron 18-270mm ƒ/3.5-6.3 Di II VC LD Aspherical IF Macro AF ~$620
Compared to the original 18-270mm, the new 18-270 PZD offers faster and quieter autofocus. Sharpness is better in some cases, worse in others; distortion and corner shading results are about the same, chromatic aberration resistance is slightly improved. The lens isn't as ''fast'' optically as the previous version; its maximum aperture decreases more rapidly, but this has allowed the lens to be smaller and lighter. About the same price.
Canon EF-S 18-200mm ƒ/3.5-5.6 IS ~$700
The Canon 18-200mm doesn't offer the same zoom reach, but the difference between 200mm and 270mm isn't huge. The Canon is sharper than the Tamron, though offering the same or slightly poorer performance relating to chromatic aberration, corner shading and distortion.
Nikon 18-200mm ƒ/3.5-5.6G IF-ED AF-S DX VR II ~$800
Perhaps the best of the superzooms, the Nikon doesn't offer the same reach, but if one were to pick the nits strongly enough we might say it's got the best sharpness performance of the lot. Great resistance to chromatic aberration, except for the extreme corners - though the Tamron handles distortion and corner shading a bit more gracefully. However, the most expensive in this lot, too.
Sony 18-250mm ƒ/3.5-6.3 DT ~$580
The Sony is surprisingly inexpensive, less costly than the Tamron, and almost matches the Tamron in its reach. The Sony is on par with the Tamron for sharpness (each has their own foibles) and offers slightly better tolerance to CA; however, the Tamron distorts slightly less and has less corner shading.
Sigma 18-250mm ƒ/3.5-6.3 DC OS HSM ~$480
The Sigma 18-250mm offers almost the same reach as the Tamron, and is the most economical of the bunch. However it has some deficiencies relating to sharpness, especially when used wide open. Chromatic aberration is also fairly evident when using this lens. On the flip side, it's probably the best performer when it comes to distortion and corner shading, with the lowest test results.
Conclusion
As you can see in the alternatives section, the manufacturers have realized that they can't afford to ignore the travel zoom market, and there is plenty of choice for all camera brands. Tamron leads the pack with reach, though not by much; the actual difference between 200mm, 250mm and 270mm is not a whole lot to write home about. The 18-270mm ƒ/3.5-6.3 PZD is, for the most part, an improvement on the original lens, especially concerning autofocus performance. It's now significantly faster and much quieter. However, there's not much relating to improved lens performance, so it is probably a design story about maintaining an existing level of quality.
If you were bothered by the autofocus performance of the old 18-270mm, it's worth the upgrade; if you're looking for the absolute most telephoto reach in the smallest conventional package, it's worth the sale. But I wouldn't rule out other alternatives, especially if you want the best performance for sharpness or other quality indicators.
Product Photos
|
The VFA target should give you a good idea of sharpness in the center and corners, as well as some idea of the extent of barrel or pincushion distortion and chromatic aberration, while the Still Life subject may help in judging contrast and color. We shoot both images using the default JPEG settings and manual white balance of our test bodies, so the images should be quite consistent from lens to lens.


Tamron 18-270mm f/3.5-6.3 Di II VC PZD AF
Your purchases support this site
Tamron 18-270mm f/3.5-6.3 Di II VC PZD AF User Reviews
-
5 out of 10 points and not recommended by fleshbuns (1 reviews)convenient lengthend of barrel turns when focusing zoom creep not very sharpNot worth the price.reviewed July 31st, 2017
Vibration control always jumps
Too much zoom creep
Sharpness rather poor -
9 out of 10 points and recommended by s87343jim (1 reviews)Small, light weight, large zoom range, VC(IS/VR), sharp at wide angleNo manual focus over-ride, small aperture at tele end, lots of distortion, focus hunt at low light, noisy VC, not so sharp at tele endThis review is based on what this lens is designed for, not compare it to professional zoom and prime lenses.reviewed February 7th, 2015 (purchased for $150)
You have to understand what this lens is designed for. It is not to replace your 24-70mm (17-50mm) + 70-200mm + 300mm lens combo in terms of image quality, but weight saving instead. It is a travel zoom lens. It is designed to be as convenient as possible, instead of produce the sharpest images with extreme shallow depth of field.
The best way to describe this lens to think of it as your 18-55+55-200/300mm kits lens merge into one. It has problems performing in low light conditions. The focus speed will drop and often struggle to find focus if you don't use the cross type focus point at the tele end. That being said, it works will in most conditions.
It is not a sport lens either, the focus is too slow for that. However, it is fast enough to capture your kids or pets running around on the field.
In terms of distortion, it is quite bad. However, it is not really noticeable in real world shooting. It is bad news if you are really into brick wall photography though. From 18-35mm(depends on your focus distance) you get barrow distortion and then pincushion after that.
VC works well. I can get most images sharp at 270mm 1/30 sec. So that's about 3 stops improvement. Not bad. It is a bit noisy though. It also takes about 0.3 sec to get into position. The is a "jump" you see on a view finder that may scare the first time user. It is not a fault, but rather how the VC is designed. It is not really a problem, because it generally takes longer to lock on focus than take a picture. In a very unlikely event, you take a picture when the "jump" happens. It may result a blurry picture.
It is a shame it has no manual focus over ride. Sure it has the PZD motor, which is a upgrade from the pervious micro motor, but there are few times I accidentally turn the focus ring while it is on the auto setting because I'm so used to working with lenses that has the manual over ride function.
So really, you have to look at this lens as what it is designed for. It is a great lens if you just want a do-it-all type of lens. You will be disappointed if you compare it to...say a prime or modern f2.8 zooms. -
9 out of 10 points and recommended by GPallas (1 reviews)Fast focus in bright light, sharp images, zoom lockdistortion evident at wide angle, sometimes hunts to focus in low light.Got this lens as Open box but obvious price mis-print for only $119. This lens at wide angle range 18-55 took sharper and more vivid pictures than the stock Sony SAM II 18-55 which I also own. The Sony SAM II did have quite a bit less distortion at 18mm, but software like DXO can fix that.reviewed February 13th, 2014 (purchased for $119)
Even though it says it Zooms to 270, the details in the photo information says 280mm focal point, which is a plus, an extra 10mm. -
8 out of 10 points and recommended by Mhudon (1 reviews)Small, light, fast autofocus, good stabilizationDust got in between the two first glass elements at the back of the lens after 8 weeksThe many reviews I have read about this lens tend to be a little harsh. It's far from perfect, but it gives you an incredible reach in a very small and light format.reviewed April 26th, 2011 (purchased for $723)
Autofocus is fast, color rendition and general image quality is predictable. If you don't want to have to fix distortion in post-prod, keep clear from all the lens in the 18-200+mm group! -
6 out of 10 points and not recommended by maskinmoller (6 reviews)size, tele coverage, sharpness at all FL, autofocus, VC worksNoisy VC!, build quality, rotating focus ring during AF, 270 mm doesn' fell like 270 mmI've had the Nikkor 18-200 mm VR before to compare with. I purchased this as the old version was told to be a bit sharper than the Nikkor, but with a very slow AF, which I'd not accept.reviewed March 16th, 2011 (purchased for $838)
This version surely has a better AF, though not quite as fast ad the Nikkor yet. It also has an effective VC, BUT it makes an annoying whining noise! I don't do videos, but for people with this interest, I guess the VC would have to be off. Even just using it for stills, the noise just got on my nerves. Not even the cheapest Nikkor VR lenses make that kind of noise.
And speaking of cheap. The build quality just isn't a match for the Nikkor 18-200 and I wouldn't trust this lens to last many years, which it should at the price point it sells.
Sad, since the IQ definitely is on top compared with other superzooms.
I've read other comment on the 270 mm isn't truly 270 mm and I got the same feeling that it breathes a lot, so I didn't really fell it being much longer than the 18-200 mm Nikkor.
At 18 mm it has very pronounced field curvation, so don't try to shoot straight lines..
If I was to rate it for shaprness alone, I'd recommend it, but it just has to many other small issues for me. -
10 out of 10 points and recommended by photojay (2 reviews)Very fast focus, excellent sharpness, light weight and not a huge lensnoneRemarkable considering it's range and what it was designed to doreviewed February 13th, 2011 (purchased for $649)
-
3 out of 10 points and recommended by horushin (1 reviews)Compact, good image quality, light, well put togetherVC and VC during Continous Auto focusImage quality seems fine. Even at 270mm it seems outstanding. The VC is a big problem. I have asked Tech support to help. Lets see where that goes.reviewed February 9th, 2011 (purchased for $684)
Tuesday, March 12, 2019
How To Shoot Macro

See also The Best Macro Lens

February 2014 Better Pictures Nikon Canon Fuji LEICA All Reviews
Best Macro Lenses
Introduction top

|
Back in 1999, there were no practical DSLRs (the world's first 2.7 megapixel Nikon D1
didn't ship until Christmas 1999 — for a bargain $5,000!), compact
cameras were crummy and the iPhone was still almost ten years away in
the future. If you were serious about great closeup photos in 1999 when I
started this website, you needed a 35mm or larger SLR and very
specialized macro lenses.
It's not 1999 anymore. Today, even the cheapest DSLRs come with kit lenses that already get very close, compact digital cameras almost always have macro modes that get within about an inch of the lens, and even the iPhone 5 gets super-close all by itself.
Want great close-up shots? Just be sure to wait a
moment for your camera or iPhone to focus, and even the iPhone works
great for super close-ups:

Only if you are really serious about your macro work or need to get closer than these shots do you need anything fancier.
If you want to get closer, don't even bother with 50mm or 105mm macro lenses; skip all the way to the Canon 180mm Macro or the Nikon 200mm Macro lenses. Here's why:
Distance
Macro photos are often thought of as close-ups,
but as macro pros know all too well, you don't really want to get too
close trying to do it.
If you get the camera too close, you:
1.) Get in the way of your own lighting.
2.) Annoy live subjects like bugs.
and
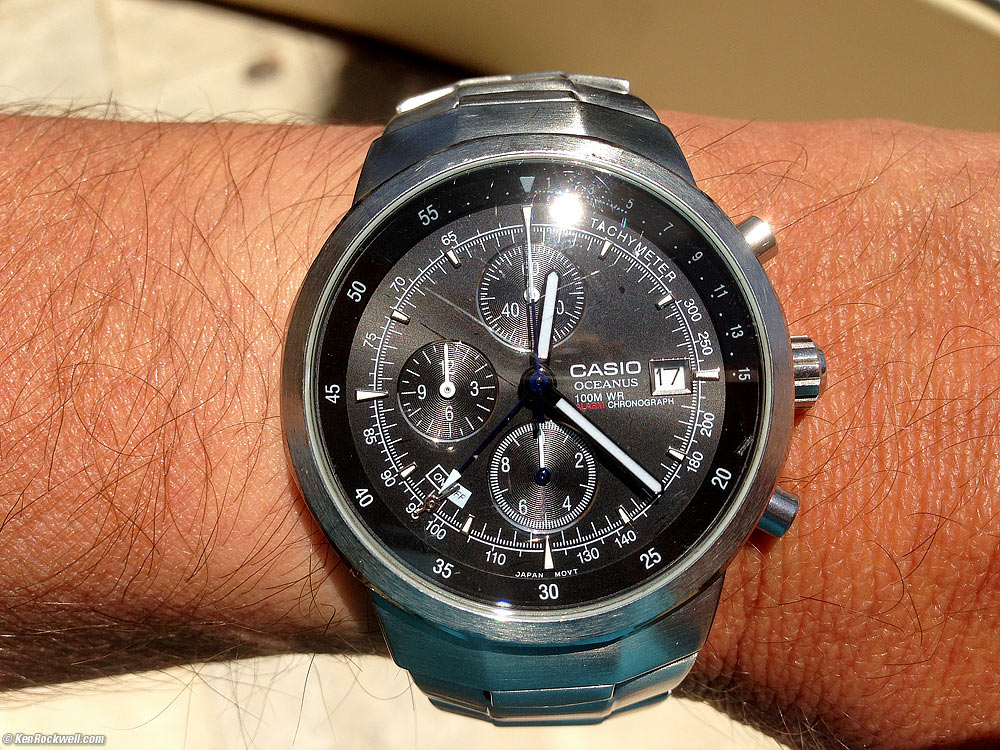
3.) Show the subject in an unnatural perspective,
since we'd never really be that close when looking at it ourselves. For
instance, in the iPhone shot above from a few inches (10 cm) away, my
watch looks much bigger than my wrist because it's so much closer to the
lens than my wrist. This isn't natural — do you really think my watch
face is as wide as my wrist?
Therefore, we want a longer lens for macro photography, not a 50mm, 55mm or 60mm lens.
Lens Choices (see also Best Macro Lenses)
Lens Sharpness
Guess what: it doesn't matter!
While some macro lenses may be sharper than others
for regular photography, as you'll learn below, there is no
depth-of-field at macro distances so nothing is in perfect focus anyway.
No matter how sharp your lens, it won't matter because nothing will be
in perfect enough focus to notice.
Since you'll be shooting at around f/32 to try to get at least one tiny swath in focus, diffraction is the limiting factor regardless of lens.
50mm Lenses
50mm macro lenses are useless for serious macro work except for copying slides, stamps and other flat artwork.
Any flatbed scanner does a better, faster and easier job for photographing anything small and flat.
50mm, 55mm and 60mm macro lenses are foolish for serious macro use precisely because you have to get too close, so we'll pass on the 50-60mm range.
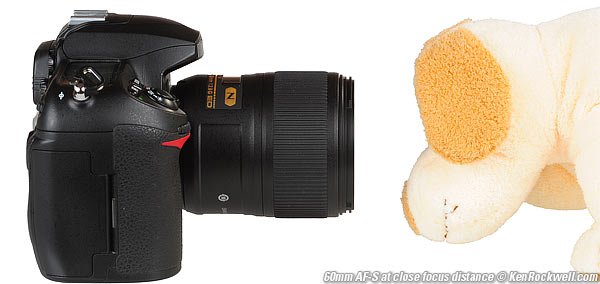
Nikon 60mm f/2.8 G at closest focus distance: too close to be useful.
By the time we get close enough for a big enough
image with a 60mm macro, there are only inches between the end of our
lens and our subject. We can't light the subject, it gets annoyed, and
it looks funny.
100mm and 105mm Lenses
Ideally we want at least a 100mm macro lens so
that we can be far enough away so we don't annoy the bugs, are able to
light our subject, and for them to be seen from a reasonably normal
perspective.
We are used to seeing everything from at least a
foot or two away (50 cm). Our eyes aren't comfortable — or can't — focus
closer than about a foot (30 cm), so macro photos made closer than this
give unnatural perspectives. Be they bugs or products,
three-dimensional objects look weirder than they should when shot from a
only foot away.
Only at least a 100mm lens lets us get far enough away, and still have enough magnification for our macro shots.
180mm and 200mm Lenses
Macro pros all use 180mm or 200mm macro lenses precisely so we can get far enough away, and still get close enough.
With a 200mm macro, you'll have a foot or two of
clearance ("working distance") between the lens and your subject, so
you'll be able to light it well, and its perspective won't be all
screwed up.
Paying attention? With my favorite Nikon 200mm f/4 AF-D,
I still have less than 11 inches (260mm) between the front of my lens
and my subject at its closest focus distance. For most subjects I shoot a
few inches to a foot (10-30 cm) wide, I can stand a couple of feet away
to have enough breathing room. Whew! This is why we need 200mm macro
lenses.
Magnification
and Reproduction Ratios
Magnification
ratios, the same as reproduction ratios, are the ratio between the
size of your subject and the size of the image at the sensor or film.
Of course when displayed or printed there is even more magnification.
Most
macro lenses have the reproduction ratios engraved on the focusing
scale. This is handy for forensic and scientific work.
Definitions
Macro is defined as photos
which are made between 1/10 life size and life size — at the
sensor. The resulting prints will be even bigger depending on the size
of the print.
Normal photography
is defined as less than 1/10 life size at the sensor, and microphotography
is defined as greater than life size. Don't worry about
this, since even these terms are defined differently by different
people. For instance, Nikon, who also makes many microscopes, refers
to their macro lenses as "micro" lenses.
Focus Modes
Serious macro work is shot in manual focus because it's faster and easier.
Unless your subject is flat, in which case a scanner
is a much better idea than a camera, autofocus gets lost and has no
idea on what to focus when you're up close to a real three-dimensional
subject.
Therefore, it doesn't matter if you use an auto-
or manual-focus lens! You'll set your AF to manual anyway, so don't
presume you have to buy a new AF lens when a used manual-focus Nikon
lens will work exactly as well — and save you a lot of money.
Hand motion alone
changes camera distance so much and so quickly that it drives any AF
system crazy.
I
sometimes focus my lens and then focus by moving the camera back and forth.
This keeps framing
constant. Small variations in your position become huge variations
in image size, so fixing the focus and moving the camera keeps
this stable.
Apertures and Depth
of Field
There
is no depth of field at macro distances.
Because there is no depth-of-field when you're this close, shoot everything at about f/32.
Try to orient your subjects
so they lie in the plane of focus. For instance, you
have to snap butterflies when their wings are lying flat. If
you can do this you can get the entire bug sharp, otherwise you get
an amateur looking photo.
With bugs, pro macro shooters spend a lot of time
trying to get the wings to lie perfectly flat, because even at f/32,
they'll be out of focus if they move a millimeter (1/32") up or down
from the plane of focus.
Shoot at larger than f/32 and you'll get too little in focus, and shoot smaller and you'll start to loose sharpness from diffraction. f/22 to f/45 are all you'll ever need.
Image Stabilization and VR
Image stabilization and VR
are useless with live subjects like flowers, bugs and animals which are
always moving. VR and IS can only counteract camera motion, not subject
motion.
VR and IS might help when using a macro lens as a
general-purpose telephoto, but are of no help for close-in macro
shooting because they usually aren't calibrated to work at macro
distances anyway, and when shooting at f/32, your exposures would be way
too long to hand-hold even with IS or VR.
VR and IS only work in two axes, or three axes in a
camera maker's dreams. Even three-axis VR or IS can't do anything to
help prevent camera motion forwards and back. When we're focused at
close macro distances, a millimeter (1/32") of motion will ruin a
hand-held macro photo.
Therefore, when shooting serious macro, you don't
need to worry about getting a lens with VR or IS. It's just a marketing
tactic to sell newer and more expensive lenses. I do this for a living,
and use my non-VR Nikon 200mm f/4 AF-D every day.
Lighting
This
is easy: use flash!
Flash lets you easily shoot at f/32 and stops
any action or camera motion. Available light is asking for trouble,
since you'll be shooting at larger apertures eliminating any of what
little depth of field you might have, or will lead you to perilously
long exposures at smaller apertures.
Most
bug photographers use two flashes mounted on opposite sides of the
lens. I use a Lepp Bracket which holds two flashes, one on each side
of the camera. This becomes a clumsy contraption with the flashes and
sync cables.
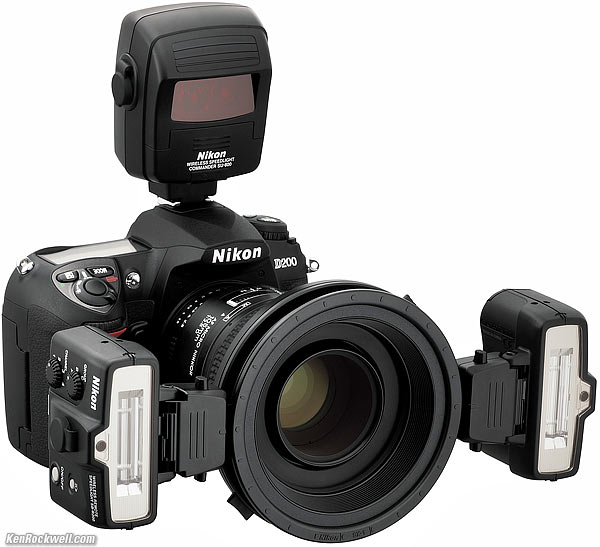
An
elegant solution for bugs is Nikon's R1C1 system
shown at the top of the page. It uses special small flashes
which screw into the front of your lens. It also eliminates all the
wires. It may pay for itself in convenience, light
weight and simplicity for bug and flower shots.
I
have not used ring lights. The off-brand one I tried had too little
power, and the overall lighting was duller from the complete ring
than the two-point lighting from two discrete flashes. If the light gets too soft, you won't see surface texture.
Personally, my macro work is product photography, and for that, I use plug-in-the-wall studio strobes.
A set of real studio strobes costs about the same as buying a bunch of
battery-powered flashes, but has far more power and flexibility to add
umbrellas and light modifiers easily. Studio strobes are made to sit on
light stands, while battery powered flashes require a lot of fiddling to
get them to stay put on light stands. See Product Photography for more.
Bigger than Life Size
You
can add extension
tubes or bellows between
your lens and camera body. I always focus manually, so these
extensions being manual focus only is no bother.
Close up lenses don't help much with today's lenses, since they already get so close.
You
also can use teleconverters, which will let even the oldest
macro lenses get to life size, and all macro lenses today to twice
life-size, at the sensor. I used to add my TC-200 to
my 105
AF Micro before I got a 200mm macro. Of course my TC-200 is manual focus,
not a problem since I focus manually in macro anyway.
Canon makes a very special 65mm f/2.8 closeup-only lens which works between life size and five-times life size. It sold for $830 in 2005, and $950 in 2013.
The bug and raindrop guys love these, too, but it's not going to replace a regular macro lens for general use.
Exposure
I
manually set the camera to f/32 for depth of field and set the shutter
to the flash sync speed (1/125 to 1/500 depending on your camera) to
eliminate ambient light.
I use the TTL flash system to let the flash
control itself
for perfect exposure as I vary distance, except when I use my
manual studio strobes, for which I simply look at the results on my LCD
and adjust accordingly.
Bellows
Factors
In
the old days we spent a lot of time worrying about exposure variations
as we got closer. This is because the lens moves away from the film
or sensor as you get closer and reduces the effective aperture. The effective
aperture reduces by two stops at life size!
Today
the Nikon cameras automatically correct the aperture of the macro
lenses to give the same effective f/stop as you get closer. Of
course your f/2.8 lens is only an f/5.6 lens at life size, but at
f/32 you won't even notice this. Remember macro lenses are
only used at full aperture for focusing and framing, not shooting.
Don't worry; your TTL exposure system reads right through all this automatically.
Camera Support
I always hand hold.
The flash
freezes any motion for perfect sharpness so there's no need for a
tripod.
If
using a tripod you'll need a geared positional mount which
allows you to shift the entire camera left and right or forward and
back to get the precise framing you need. It's almost impossible to
lift and move a tripod precisely by the fractions of an inch needed in macro
work.
Other Formats
Physics
makes this easier as the sensor or film gets smaller. As film gets
bigger the depth of field collapses to nothing, and the f/stops are
approaching pinholes and eliminating resolution due to diffraction
and making lighting impossible.
Macro shooting is trivial with point-and-shoot
digital cameras and iPhone, easy with digital and 35 mm SLRs,
doable with medium format cameras and next to impossible with 4 x 5" cameras.
Compact Digital Cameras
Most point and shoot digital cameras have built-in macro
modes which let you get as close as an inch.
These
cameras focus most closely at the widest zoom setting, where you usually get a
lot of barrel distortion which curves out straight lines along the sides
of the image. Try zooming them in a bit towards tele, and expect
that they usually can't get quite as close at the tele setting. You have
to find the best zoom setting for each camera.
The distortion is usually easy to fix
in Photoshop, but you can't fix the weird point of view you get from shooting too close with a wide lens.
Zoom as long as you can and get as far away as you can to frame the photo you need.
Medium Format
Use an SLR
like the Hasselblad or Contax 645. Not only can you
focus close enough and get dedicated macro lenses, the SLR viewing
lets you see what you're getting and make exposure measurements
through the lens.
SLR
cameras with bellows like the Fuji
GX680 system and old Rollei
SLX are even better because every lens can focus extremely closely.
Large Format
Unless
you're a professional jewelry photographer you'll probably want
to skip this.
It is very tedious because you need to calculate
your bellows factors manually. See a book like Ansel Adams'
"The
Camera" or Steve Simmon's "Using
the View Camera" for the calculations.
I do the calculations once for each lens and mark the factors on
a long strip of paper. I hold the paper to the camera and read off the
correction depending on lens extension. Calumet sells calculator
sticks, which are rulers marked with the factors for different
lenses. Some calculators are viewed through the ground glass
and the factors read off by how many 1 cm graduations they cross.
I told you this got complicated!
You'll
need a lot of light and will probably need a set of studio strobes
like the Novatrons.
Help me help you top
I support my growing family through this website, as crazy as it might seem.The biggest help is when you use any of these links when you get anything, regardless of the country in which you live. It costs you nothing, and is this site's, and thus my family's, biggest source of support. These places have the best prices and service, which is why I've used them since before this website existed. I recommend them all personally.
If you find this page as helpful as a book you might have had to buy or a workshop you may have had to take, feel free to help me continue helping everyone.
If you've gotten your gear through one of my links or helped otherwise, you're family. It's great people like you who allow me to keep adding to this site full-time. Thanks!
If you haven't helped yet, please do, and consider helping me with a gift of $5.00.
As this page is copyrighted and formally registered, it is unlawful to make copies, especially in the form of printouts for personal use. If you wish to make a printout for personal use, you are granted one-time permission only if you PayPal me $5.00 per printout or part thereof. Thank you!
Thanks for reading!
Minolta Maxxum AF Macro 50mm 1.8 lens

lens when they’re attached to the latest cameras?
I went to my local camera stores and purchased the following lenses to experiment with:
- 1985 Minolta 70-210mm f/4 – Price paid: $100
- 1986 Minolta 100mm f/2.8 Macro (1:1 reproduction ratio) – Price paid: $275
- 1985 Minolta 50mm f/1.7 – Price paid: $50
- 1985 Minolta 28mm f/2.8 – Price paid: $95
At first I thought that the manual focus bit would be a pain in the butt and result in missed shots and lots of frustration. I couldn’t have been more wrong. The Sony A7 was blessed with an awesome feature called Focus Peaking. What this does is show you in the viewfinder what is in focus by highlighting those areas with a scattering of red dots. If you see red scatter in and around the thing you’re focusing on, you know you’ve got it.
The electronic viewfinder (EVF) of the Sony A7 is quite clear and high enough resolution to make this very easy to see. You can even set one of the programmable buttons on the camera body to zoom in to 100% image size in area of your choosing if you’re doing some super fine focus adjustments like in Macro Photography. Manual focus on these cameras is simple.
In fact, it’s so simple that I now prefer it over autofocus. With autofocus, even with my big Nikons, sometimes it just selects the wrong feature to focus on and ruins the shot (camera set to center focus spot – focus then compose). I’m very picky about what’s in focus especially when you have a fast lens which have very shallow depth-of-field when used wide open; so fine that you could have eye lashes in focus while the eye is not.
I’ve digressed… Manual focusing these Minolta lenses has been a dream!
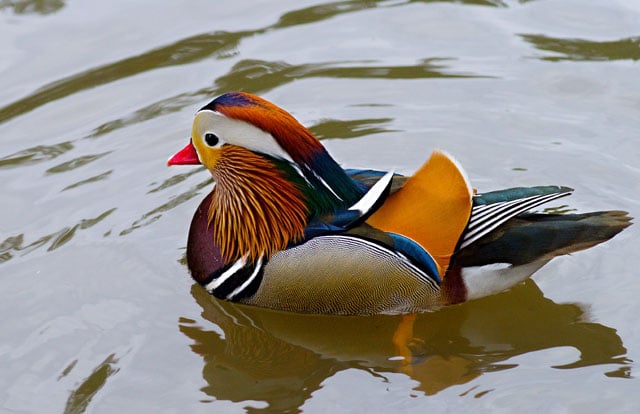
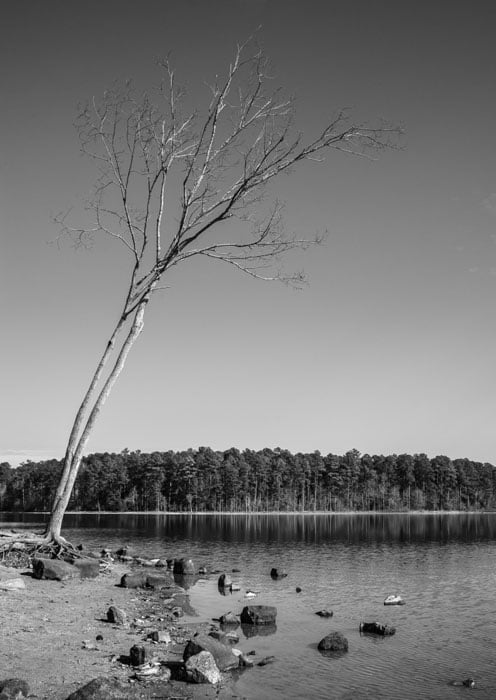
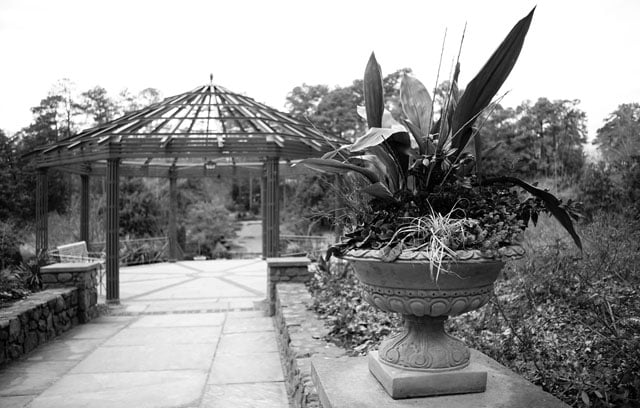
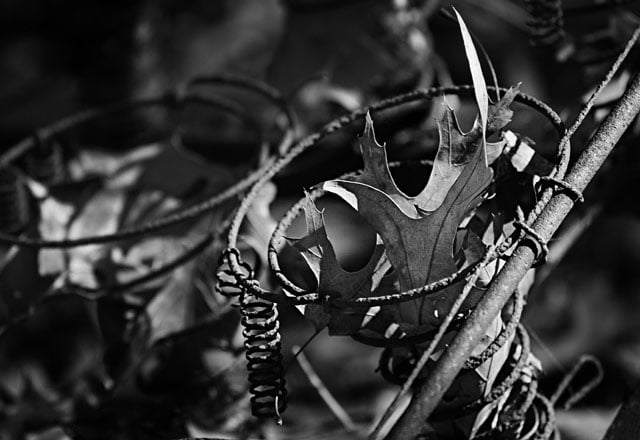
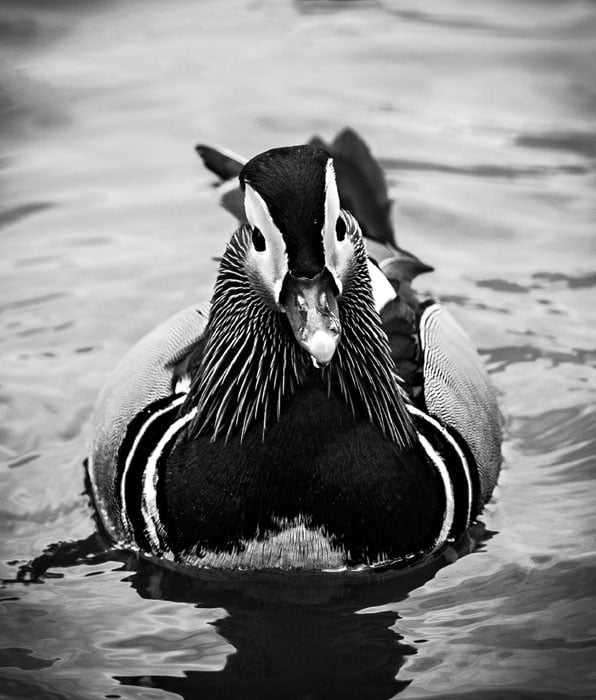
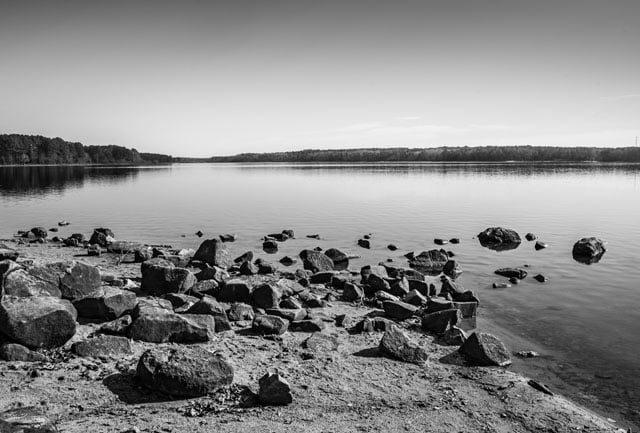
What I want to do now is give the writing a rest and just show you photos made with each of these lenses over the past few weeks. In the caption beneath each image I’ll list which lens was used for that shot.


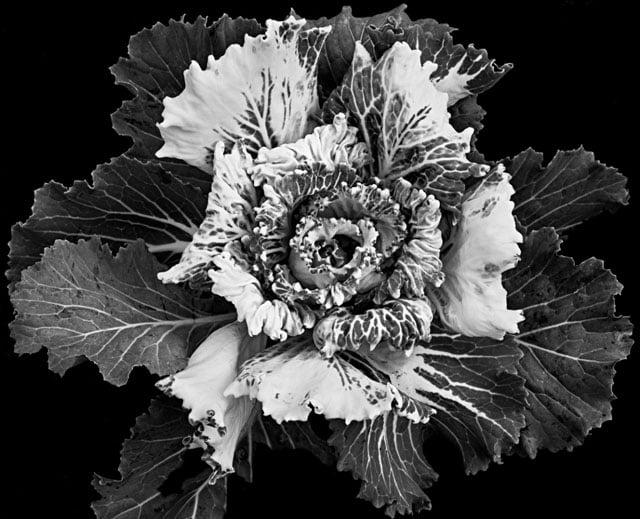


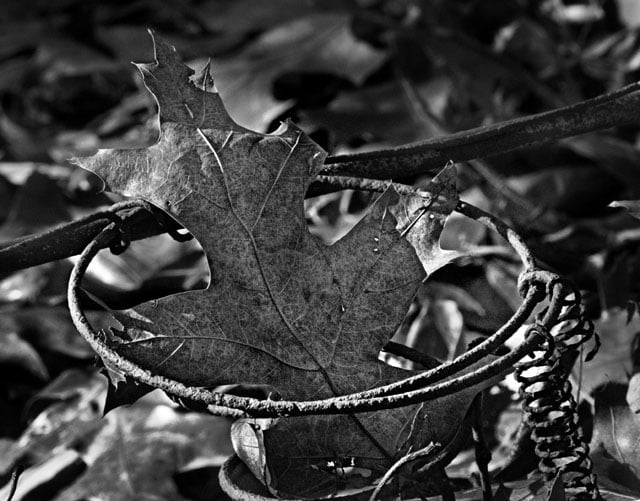


The past few weeks spent shooting with this collection of Minoltas has rekindled my enjoyment of photography in a way I haven’t experienced in years. I have recently sold my Zeiss lenses and committed myself to using these Old Timers for the foreseeable future.
Subscribe to:
Posts (Atom)